
 Look at that goofy face! Man, I adore this girl. Yesterday I told you all about Miss Belle's stronghold on her pjs that she outgrew long ago. And I showed how I made a bunny friend, Snowball, for Miss Belle to coordinate with in her new, revamped, frog clothes. Today I'm going to go over the steps I took to make Miss Belle's frog outfit.
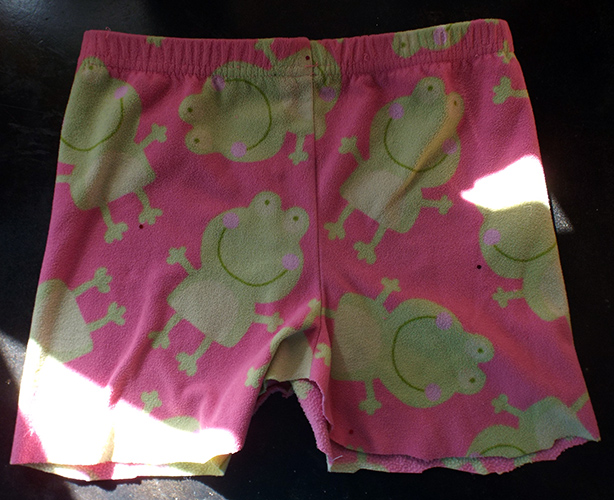
In case you need a reminder, this is what we were working with. Oh, the flooding!

I decided to make Miss Belle a jumper and matching t-shirt.
One thing that I frequently forget to do, and it always comes back to bite me later, is pre-washing my fabric. Remember that cute outfit I made for Little Boy Blue for the 4th of July? Shrunk! It was so disappointing. But a good reminder that, if I want my kids to wear the clothes I make more than once, I must pre-wash the fabric. Just do it!
Part 2: A shirt and jumper for Miss Belle
After pre-washing this purple knit I had on hand, I cut out the pieces for a quick and easy boatneck tee. A front, back, and two sleeves. Then I got to work, beginning with the sleeves. I cut each sleeve slightly longer than I wanted it to be. Then I folded over the bottom to make a casing for elastic.


Then, with right sides facing, I sewed the front and back pieces of the shirt together at the shoulders.

And attached the sleeves.

Again with the right sides facing, and making sure to line up the end of the sleeve and armpit, I pinned and sewed the sides of the shirt together. All the way from the end of the sleeve to the bottom of the shirt.

It looks like a shirt!

I did a simple zigzag stitch along the bottom edge of the shirt. Pay no attention to the sprinkles of water from my iron.

For the shirt collar, I cut a strip of fabric on the bias, 1 1/2" wide and the length of the neck circumference. I folded and ironed it in half, wrong sides together. Then I opened it up and sewed the ends together to make a circle.

I pinned and sewed it to the neck of the shirt, with the right side of the collar facing the wrong side of the shirt.

Then I flipped the shirt right side out.

Pressing the shirt edge up, I folded the collar over in the middle where I had previously ironed it in half. Then I folded it over again, flat against the outside of the shirt.

And topstitched it into place.

A completed shirt.

Now it was finally time to start deconstructing those pjs and work on the jumper.
After trying the pants on Miss Belle, I cut off the bottom of the legs and removed the elastic from the waistband.
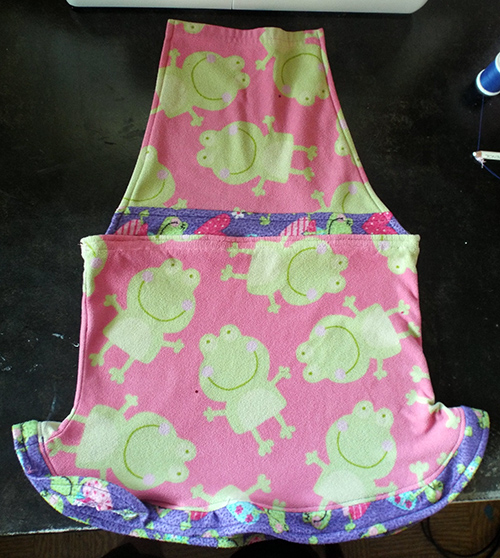
I turned it sideways and used the shape from the crotch to give the skirt a little flip on the sides.

Then I cut a length of fabric from the legs of the footie pjs and made a trim for the bottom of the skirt.

For the bib of the jumper, I cut a trapezoid from one of the legs. I added some purple to the bottom of it too.

I folded over the side of the bib 1/4" and pressed it. Then folded it over 1/4" again.

And stitched along the side.

With right sides facing, I sewed the bib to the top of the skirt.

Then I pressed the bib up and topstitched along the seam.
At this point, I tried the jumper on Miss Belle. It was a little big around the waist. The back of the jumper was 14" and I wanted to take it down to 8". So I made a casing and pulled a piece of elastic, 8" long, through. I sewed it into place on both ends.


Then I pulled out my button making kit and made a pair of big buttons covered with fabric from the purple frog pjs.


Finally, I made two straps to criss cross in the back and button onto the front.


Coming up tomorrow: Part 3 (the conclusion!) of the Frog PJ Fashion Refashion, where we make a new dress for Snowball the Bunny.

No comments:
Post a Comment